Straight Trailer Axle Inspection and Maintenance from Hub to Suspension
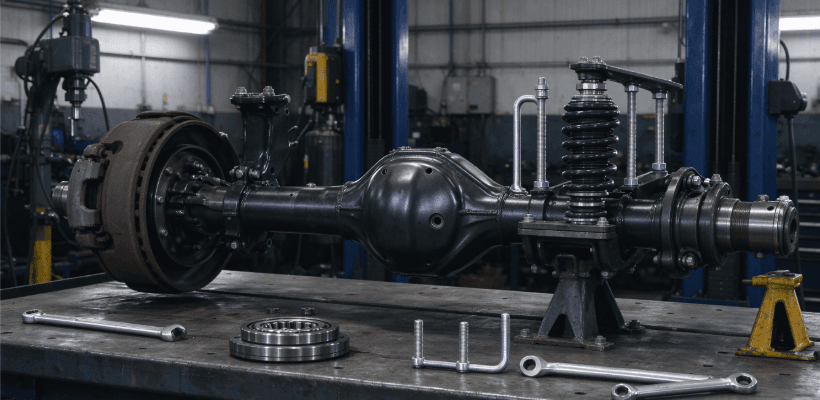
<p><span style="color: rgb(32, 32, 32); font-size: 10.5pt;">A straight trailer axle lasts only as well as the complete running gear is inspected and serviced. Bearing condition, brake adjustment, tire pressure, suspension fasteners, seals, and corrosion all affect safe operation. This guide provides a practical inspection routine for trailer owners and fleet technicians, explains how to spot early warning signs, and shows how to use manufacturer guidance without applying one brand’s service interval to every axle. Runheng supplies straight axles and related trailer components; the exact maintenance instructions for a purchased assembly should come from the applicable axle and brake manuals.</span></p><h2><span style="color: rgb(0, 0, 0); font-size: 12pt;"><strong>In this guide</strong></span></h2><p><span style="color: rgb(32, 32, 32); font-size: 10.5pt;">Inspection timing; hub and bearing service; brake and suspension checks; tire and load clues; corrosion and storage; maintenance data table; troubleshooting FAQ.</span></p><h1><span style="color: rgb(0, 0, 0); font-size: 15pt;"><strong>Inspect before use and at service intervals</strong></span></h1><p><span style="color: rgb(32, 32, 32); font-size: 10.5pt;">Before each trip, look for a shifted wheel, damaged tire, loose or missing fastener, leaking grease or oil, hanging wiring, damaged brake line, cracked spring, or visible impact damage. After towing, pay attention to unusual heat, noise, vibration, pulling, or a change in stopping behavior. These symptoms are not diagnoses by themselves, but they justify inspection before the next trip. For commercial fleets, record mileage, load conditions, repairs, and repeat defects so technicians can identify patterns.</span></p><p><span style="color: rgb(32, 32, 32); font-size: 10.5pt;">Use the axle, hub, bearing, and brake manufacturer’s instructions for lubrication type, adjustment, torque, and replacement limits. As one example, Dexter Group recommends bearing service every 12 months or 12,000 miles, whichever comes first, for its products [1]. That is Dexter’s published recommendation and should not be automatically applied to a Runheng axle or a different bearing arrangement. Confirm the actual interval and lubricant with the manual for the installed hub and bearing set.</span></p><h1><span style="color: rgb(0, 0, 0); font-size: 15pt;"><strong>Hub, bearing, and seal checks</strong></span></h1><p><span style="color: rgb(32, 32, 32); font-size: 10.5pt;">At a scheduled service, inspect hub play and rotation using the procedure specified by the component manufacturer. Look for roughness, noise, heat discoloration, water contamination, metal debris, damaged seals, and grease leakage. A hub that runs hot can indicate bearing preload, lubrication, brake drag, overload, or another fault; do not simply add grease and return it to service without identifying the cause. Use the correct grease or oil specification and keep work areas clean to avoid contaminating bearings.</span></p><p><span style="color: rgb(32, 32, 32); font-size: 10.5pt;">When a hub is opened, replace seals and other single-use parts where the service manual requires it. Inspect the spindle and bearing races for scoring, pitting, or heat damage. Verify wheel-end fasteners with the required torque sequence and tool. If the wheel has been removed, retorque according to the wheel maker’s instructions after initial service where required. These details vary by hardware; generic torque tables can be unsafe when they do not match the stud, nut, wheel, or hub.</span></p><h1><span style="color: rgb(0, 0, 0); font-size: 15pt;"><strong>Brakes and suspension need separate checks</strong></span></h1><p><span style="color: rgb(32, 32, 32); font-size: 10.5pt;">For a braked axle, inspect drum or rotor surfaces, brake shoes or pads, magnets or hydraulic components, backing plates, wiring, connectors, and adjustment. Confirm the breakaway system and controller operation according to the trailer manual. A brake that drags can overheat the hub; a brake that does not engage can increase stopping distance and load other axles. Keep records of lining thickness and component replacement, and compare measurements with the relevant service limits rather than visual guesswork.</span></p><p><span style="color: rgb(32, 32, 32); font-size: 10.5pt;">Inspect springs, equalizers, hangers, U-bolts, and suspension bushings for cracks, distortion, wear, and looseness. Look for witness marks that indicate movement at connections. Do not weld, straighten, or heat a loaded axle beam unless an approved repair procedure specifically allows it; an incorrect repair can affect alignment and strength. After a severe pothole strike or curb impact, inspect alignment, wheel runout, and tire condition even if no part appears broken.</span></p><h1><span style="color: rgb(0, 0, 0); font-size: 15pt;"><strong>Use tires as an early warning system</strong></span></h1><p><span style="color: rgb(32, 32, 32); font-size: 10.5pt;">Uneven tread wear can indicate inflation problems, overload, alignment error, bent components, or suspension wear. Check cold pressure against tire and trailer specifications, and do not exceed wheel or tire ratings. Secure cargo as designed. The axle label does not increase a lower-rated tire, wheel, coupler, frame, or suspension capacity. Have a qualified trailer maker assess persistent one-sided wear, repeated bearing heat, or unusual tracking.</span></p><h2><span style="color: rgb(0, 0, 0); font-size: 12pt;"><strong>Published data and project reference</strong></span></h2><table style="min-width: 75px;"><colgroup><col style="min-width: 25px;"><col style="min-width: 25px;"><col style="min-width: 25px;"></colgroup><tbody><tr><td colspan="1" rowspan="1"><p><span style="color: rgb(255, 255, 255); font-size: 9pt;"><strong>Inspection item</strong></span></p></td><td colspan="1" rowspan="1"><p><span style="color: rgb(255, 255, 255); font-size: 9pt;"><strong>Timing example</strong></span></p></td><td colspan="1" rowspan="1"><p><span style="color: rgb(255, 255, 255); font-size: 9pt;"><strong>What to record</strong></span></p></td></tr><tr><td colspan="1" rowspan="1"><p><span style="color: rgb(32, 32, 32); font-size: 8.5pt;">Pre-trip visual review</span></p></td><td colspan="1" rowspan="1"><p><span style="color: rgb(32, 32, 32); font-size: 8.5pt;">Before each trip</span></p></td><td colspan="1" rowspan="1"><p><span style="color: rgb(32, 32, 32); font-size: 8.5pt;">Tire condition, visible leaks, fasteners, wiring, damage.</span></p></td></tr><tr><td colspan="1" rowspan="1"><p><span style="color: rgb(32, 32, 32); font-size: 8.5pt;">Bearing service</span></p></td><td colspan="1" rowspan="1"><p><span style="color: rgb(32, 32, 32); font-size: 8.5pt;">Dexter example: every 12 months or 12,000 miles</span></p></td><td colspan="1" rowspan="1"><p><span style="color: rgb(32, 32, 32); font-size: 8.5pt;">Use installed component manual; note lubricant and parts.</span></p></td></tr><tr><td colspan="1" rowspan="1"><p><span style="color: rgb(32, 32, 32); font-size: 8.5pt;">Brake inspection</span></p></td><td colspan="1" rowspan="1"><p><span style="color: rgb(32, 32, 32); font-size: 8.5pt;">At service interval and after symptom/impact</span></p></td><td colspan="1" rowspan="1"><p><span style="color: rgb(32, 32, 32); font-size: 8.5pt;">Lining or pad condition, adjustment, electrical/hydraulic tests.</span></p></td></tr><tr><td colspan="1" rowspan="1"><p><span style="color: rgb(32, 32, 32); font-size: 8.5pt;">Suspension and wheel fasteners</span></p></td><td colspan="1" rowspan="1"><p><span style="color: rgb(32, 32, 32); font-size: 8.5pt;">Routine service; after severe impact</span></p></td><td colspan="1" rowspan="1"><p><span style="color: rgb(32, 32, 32); font-size: 8.5pt;">Cracks, looseness, torque procedure, replacement actions.</span></p></td></tr><tr><td colspan="1" rowspan="1"><p><span style="color: rgb(32, 32, 32); font-size: 8.5pt;">Tire pressure and wear</span></p></td><td colspan="1" rowspan="1"><p><span style="color: rgb(32, 32, 32); font-size: 8.5pt;">Before travel; review at service</span></p></td><td colspan="1" rowspan="1"><p><span style="color: rgb(32, 32, 32); font-size: 8.5pt;">Cold pressure, tread pattern, load distribution observations.</span></p></td></tr></tbody></table><p><span style="color: rgb(0, 0, 0); font-size: 10.5pt;"> </span></p><h1><span style="color: rgb(0, 0, 0); font-size: 15pt;"><strong>Corrosion, water, and storage</strong></span></h1><p><span style="color: rgb(32, 32, 32); font-size: 10.5pt;">Road salt, standing water, coastal air, and damaged paint can accelerate corrosion. Clean the axle and brake area using methods approved by the manufacturers, then inspect coating damage, weld areas, spring seats, and attachment points. Keep drain paths open and avoid trapping moisture behind debris. For boat trailers, immersion and repeated launching can expose hubs and brakes to water; use components and service procedures intended for that environment. After saltwater exposure, follow the trailer and hub manufacturer’s rinse and inspection instructions.</span></p><p><span style="color: rgb(32, 32, 32); font-size: 10.5pt;">During storage, protect the assembly from standing water and service bearings and brakes according to the manual. Before reuse, inspect tires, test lights and brakes, and check wheel-end rotation. Track time and mileage because low-use trailers can still develop moisture, corrosion, or seal problems.</span></p><h1><span style="color: rgb(0, 0, 0); font-size: 15pt;"><strong>A practical inspection example</strong></span></h1><p><span style="color: rgb(32, 32, 32); font-size: 10.5pt;">If a trailer arrives with one warm hub and feathered wear on the same side tire, treat both observations as clues. First stop use, let parts cool, and compare the affected side with the opposite side without touching hot components. A technician can then check bearing condition and adjustment, brake drag, axle alignment, suspension fasteners, tire pressure, and load distribution. If the beam or spindle is bent, replace or repair only under an approved procedure. This example illustrates diagnostic sequencing; it does not identify a single cause or claim a Runheng field case.</span></p><p><span style="color: rgb(32, 32, 32); font-size: 10.5pt;">A maintenance sheet should include date, mileage or operating hours, axle position, load category, tire pressure, bearing service, brake measurements, fastener checks, corrosion, and repairs. Trend records can reveal recurring alignment or operating issues. Keep them with the trailer identification and axle configuration to help match replacement components.</span></p><h1><span style="color: rgb(0, 0, 0); font-size: 15pt;"><strong>Frequently asked questions</strong></span></h1><p><span style="color: rgb(32, 32, 32); font-size: 10.5pt;"><strong>Can I use the same bearing interval for every straight axle?</strong> No. Follow the manual for the actual hub and bearing system. Dexter’s 12-month/12,000-mile interval is an example for Dexter products, not a universal interval.</span></p><p><span style="color: rgb(32, 32, 32); font-size: 10.5pt;"><strong>Is a warm hub always a failed bearing?</strong> No. Brake drag, overload, lubricant, adjustment, and operating conditions can contribute. Compare sides safely and have a technician inspect the cause.</span></p><p><span style="color: rgb(32, 32, 32); font-size: 10.5pt;"><strong>Should I tighten a loose U-bolt?</strong> Use the suspension maker’s inspection and torque procedure. Replace damaged hardware and do not guess at torque.</span></p><p><span style="color: rgb(32, 32, 32); font-size: 10.5pt;"><strong>When should an axle be replaced?</strong> Replace it when inspection shows damage beyond approved repair limits, when capacity or dimensions do not match the trailer design, or when a qualified technician determines it is unsafe.</span></p><h1><span style="color: rgb(0, 0, 0); font-size: 15pt;"><strong>Conclusion and next step</strong></span></h1><p><span style="color: rgb(32, 32, 32); font-size: 10.5pt;">A straight trailer axle inspection should cover the hub, bearing, seal, brake, wheel, tire, spring, fasteners, and beam as one connected system. Use pre-trip visual checks plus scheduled servicing based on the actual manuals and operating environment. Published intervals from another manufacturer can inform planning but are not a substitute for the instructions that apply to the installed parts. Keep service records and provide the axle model, measurements, load information, and symptoms when asking Runheng or a qualified technician about replacement or technical support.</span></p><h1></h1><p></p>